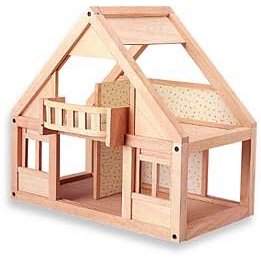
Wood dollhouse plans can come with just the basics or you can think big and check out something a little more elaborate, it’s up to your imagination and skill level to choose something achievable. There are several things you’ll need to gather before starting your project and it’s also important to make sure you have a clean place with enough room to accommodate the finished dollhouse.
A trip to the local hardware store to collect your supply of wood and other materials is all that stands between you and a new dollhouse for the little princess in your life. Here’s a list of supplies that you will need, or might want to have handy when building your wooden dollhouse.
Glue: Most of the dollhouse parts are secured with glue. It’s recommend finding wood glue that will set fairly fast, is easy to wipe-off, paint or sand, and has a good applicator tip. This is the main fastening compound you will use to keep your dollhouse together, unless, of course, you build a very large dollhouse.
Masking tape: You will need this to keep parts of the dollhouse together while waiting for the glue to dry. It also comes in handy to cover specific areas of the dollhouse when painting.
Pencil: Necessary for marking lines to cut and lining up parts.
Hammer and various sized small nails: Many dollhouse kits come with nails that you can choose to use to make your dollhouse more secure. If you’re not using a kit, make sure and have a selection of different sized nails to choose from for nailing the different sized pieces of wood together.
Fine tooth saw: If you get a dollhouse kit, most parts in the dollhouse are ready to be assembled, but a few will require some trimming or cutting.
Utility/X-acto Knife: Also for trimming and cutting. This tool can be especially important when shingling your roof and for fine detail cutting and trimming.
100 grit sandpaper: For smoothing down the cut edges.
Rubber bands: When assembling window frames and other smaller objects, rubber bands are handy to have for holding things together until they dry. Once you’ve finished building the dollhouse, you’ll need to gather the necessary items like paint and brushes to put the finishing touches on the outside, then, finally comes the fun of decorating the interior.
If you’re a rather more adventurous or a more skilled crafts person, you may want to try building your dollhouse from scratch. No matter what you decide, you will still need a set of plans to build. Readymade kits come with everything you need to put it together with minor actual woodworking needed. If you build from scratch, you will have to buy all the materials yourself and follow the plans carefully. This will include having the proper tools to cut the wood into the proper sizes and once the wood is cut, it will be similar to putting together a kit dollhouse because what is left is the assembly of the pieces.

- After you gather all your pieces together, the first thing you’ll need to do is cut out and trim all the wood to the size stated in your plans. Once all the woods pieces are measured and cut, sand off any rough edges with sandpaper.
- Now you’re ready to cover the inside walls with wallpaper, paint or fabric of your choosing. Use of a utility knife and a straight edge are necessary to trim the wall covering, whether it is fabric or wallpaper, from the edges for a neater look.
- If your dollhouse is going to have stairs, now is the time to build them.
- Make all the windows, which are usually some type of plastic, and insert them where required in all of the external walls of the dollhouse.
- Using glue, then a tack hammer and finishing nails, put together the outside walls of the dollhouse, together with the additional stories, stairs and interior wall supports.
- Whether or not you are going to paint the exterior, put on vinyl type siding, or create your own unique design, now is the time to add the outside décor.
- If your individual dollhouse has a roof, add that to the top.
- Finally, it’s a good idea to finish off by trimming the external part of the house with moldings at the corners as they help with holding the edges of the siding in place and give it a much neater and more finished look. Don’t forget to add trim around the outside of the doors and windows in addition to trim around the roof as well.
Now your precious little girl is ready to spend hours playing and creating memories with her new wooden dollhouse. It will be an heirloom to be passed down through the generations and enjoyed for years to come.